


Keep the flow of energy going for your students as they master electrolysis
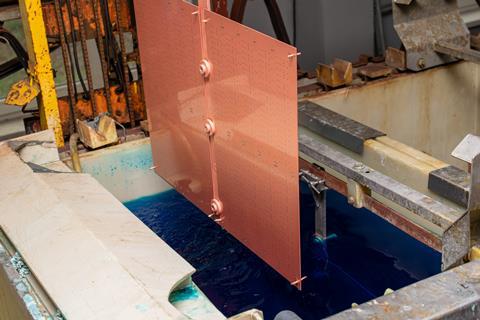
The applications of electrolysis are everywhere – from the tin covering of a tin can to the shiny chrome of our kitchen taps. Even helping development of sustainable fuels like hydrogen power. Although the products of electrolysis are in our everyday lives, the content and concepts for a 14–16 year-old are tricky and demanding.
Teaching this topic involves several abstract concepts: ions, particle theory, redox and energy, all sprinkled with new terminology. This presents a challenge and an opportunity for chemistry teachers to help students improve their understanding in this area.
What students need to know
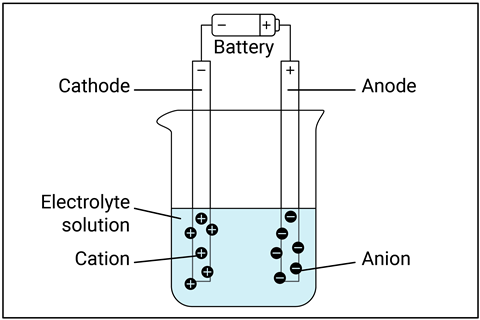
- Electrolysis is the breaking down of an ionic compound with electricity. An electrolyte is the liquid that is electrolysed. This can be either a solution or a molten compound where the ions are free to move.
- An electrode is a solid that conducts electricity into and out of the electrolyte.
- During electrolysis, the cathode is the negative electrode, and the anode is the positive electrode.
- When ions reach an electrode, they are discharged; they lose or gain electrons to become a neutral species.
- At this level, only elements form in electrolysis: metals or hydrogen at the cathode and oxygen or halogens at the anode.
What you need to know
Most post-16 specifications do not look at electrolysis, a process that uses electrical energy, but instead focus on electrochemical reactions to produce electrical energy. This is an important distinction, and one to make clear to your A-level students. It also presents a nomenclature challenge because in electrolysis we say oxidation occurs at the positive anode. However, when we teach electrochemical cells, we say oxidation occurs at the negative anode. Many people find it difficult to remember this tricky distinction. The polarity of the anode differs between electrolysis and electrochemical cells though the process of oxidation always happens at the anode. It is important that we appreciate the connection and the difference between electrolysis and electrochemical cells.
You can use the electrochemical series to explain why hydrogen forms instead of sodium in the electrolysis of aqueous sodium chloride. This is also an opportunity to explain reactivity in terms of how easily ions accept or lose electrons.
Common misconceptions
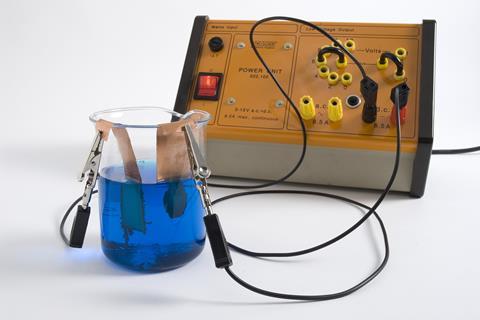
Students find it difficult to appreciate how elements form at electrodes. Help them by challenging them to explain experimental results. For example, if you electrolyse copper sulfate solution, this will form copper on the cathode. Ask students questions, such as: where did the copper come from? Is this copper the same as the copper in the solution? What happened to the copper in the solution for it to form on the cathode? Why did the copper end up at the cathode and not the anode?
You can use Johnstone’s triangle to help here. Challenge students to explain their observations (macroscopic level) by applying their understanding of the particles involved. Students can move on to representing this symbolically with half-equations. Use further examples with or without supportive questions.
Students find it difficult to appreciate how elements form at electrodes. Help them by challenging them to explain experimental results. For example, if you electrolyse copper sulfate solution, this will form copper on the cathode (rsc.li/45mukvA). Ask students questions, such as: where did the copper come from? Is this copper the same as the copper in the solution? What happened to the copper in the solution for it to form on the cathode? Why did the copper end up at the cathode and not the anode?
You can use Johnstone’s triangle to help here (rsc.li/45iUi2P). Challenge students to explain their observations (macroscopic level) by applying their understanding of the particles involved. Students can move on to representing this symbolically with half-equations. Use further examples with or without supportive questions.
Students must be able to identify the ions present in the electrolyte. If they cannot, they cannot identify the product or write the relevant half-equations. They must understand whether the electrolyte is molten or a solution by either reading the question or looking for state symbols. One way to address this is to reinforce the learning visually: you can use a match-up activity, flash cards or images on a screen, or show them a solid compound then turn it into a solution by adding water.
Suggestions for your teaching
Electrolysis is a difficult topic to teach and for students to learn because it introduces new terminology as well as abstract chemical ideas like ions, particle theory and redox. Placing electrolysis correctly in the curriculum map is crucial. Spiralling your curriculum can support students in building the foundational knowledge they need, including ionic bonding, particle theory and redox in terms of electrons before tackling electrolysis.
Electrolysis is a difficult topic to teach and for students to learn because it introduces new terminology as well as abstract chemical ideas like ions, particle theory and redox. Placing electrolysis correctly in the curriculum map is crucial. Spiralling your curriculum can support students in building the foundational knowledge they need, including ionic bonding, particle theory and redox in terms of electrons before tackling electrolysis (rsc.li/4lgiTvg).
In its simplest terms, electrolysis – if you look at its etymology – means breaking down with electricity. This could be a way to introduce the topic: ask students to predict which elements form when zinc chloride is electrolysed.
Students struggle with the idea that ions in solution are separate and can move. Show ions moving by using the copper dichromate demonstration. This can lead to a good discussion on which ions are moving to which electrode. You could start with copper sulfate so there is only one coloured ion to discuss and explain, then look at copper dichromate. You could also use the migration of manganate(VII) ions practical. Be mindful of the cognitive load when doing practicals so students do not become lost.
Students struggle with the idea that ions in solution are separate and can move. Show ions moving by using the copper dichromate demonstration (rsc.li/45KrzED). This can lead to a good discussion on which ions are moving to which electrode. You could start with copper sulfate so there is only one coloured ion to discuss and explain, then look at copper dichromate. You could also use the migration of manganate(VII) ions practical (rsc.li/3H2gtT3). Be mindful of the cognitive load when doing practicals so students do not become lost.
By attempting to electrolyse solid sodium chloride and then adding water, you can illustrate quite nicely that ions need to be free to move. Using questions and answers will lead students to understand molten compounds as the second way ions are free to move.
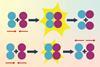
To help students appreciate the role of electrons, use active learning. Make one wall of your teaching room a cathode and one the anode, then assign some students to be positive ions and some to be negative ions. Use Post-it notes as electrons. The cathode and negative ions would have lots of Post-it notes on them becasue the negative ions carry electrons and the cathode receives electrons. Then, with some theatre, declare the circuit on. The positive ion students go to the cathode and gain electrons (Post-it notes), and the negative ion students go to the anode and lose their Post-it notes. You, as the teacher, can move Post-it notes from the anode to the cathode to illustrate the need for a power supply. When it comes to writing the half equations, refer to the students who were anions and what happened to their electrons.
You can use decision trees (students have a flowchart to follow with Yes or No choice boxes to identify the products), prediction games (where students roll a die to come up with the name of the ionic compound then identify products), and animations to help students on their journey from electrolyte to products. It is also important to have a sequence of questions and concepts to help students to deepen their understanding. For students to be successful, they need to be able to follow the steps in the process shown below. I tend to show this process flow diagram at the beginning of the topic so students can see the journey they are about to start.

Resources for your classroom
- Sequencing practicals for electrochemistry is a great way to reinforce the connection between ionic compounds, electrolysis and redox.
- Help students identify the positive and negative electrodes in electrochemical cells with these electrolysis worksheets.
- Encourage students to make detailed observations of what is happening at the positive and negative electrode by using the microscale chemistry approach to electrolysis. This resource works well for teaching and revision.
- Use an easy demonstration to show that gases can be formed during electrolysis and link this to help students revise their understanding of gas tests and reinforce the identity of the products formed.
- Encourage students to investigate chemical reactions and apply their knowledge of the reactivity series with this practical video.
Resources for your classroom
Sequencing practicals for electrochemistry is a great way to reinforce the connection between ionic compounds, electrolysis and redox: rsc.li/4mujbQ2
Help students identify the positive and negative electrodes in electrochemical cells with these electrolysis worksheets: rsc.li/4mvgTAi
Encourage students to make detailed observations of what is happening at the positive and negative electrode by using the microscale chemistry approach to electrolysis. This resource works well for teaching and revision: rsc.li/4fyehzu
Use an easy demonstration to show that gases can be formed during electrolysis and link this to help students revise their understanding of gas tests and reinforce the identity of the products formed: rsc.li/4ouI2W2
Encourage students to investigate chemical reactions and apply their knowledge of the reactivity series with this practical video: rsc.li/45mukvA


No comments yet